Every so often an animated film comes along that gains widespread attention. With its engaging story, gorgeous graphics, and immense soundtrack, Danse Macabre is one such film. It has been so well received that it was featured at the Annecy International Animated Film Festival in June 2026.
Danse Macabre is an apocalyptic nightmare, written, directed, and painted by Hisko Hulsing. The film is based on the Allegro from Shostakovich’s 10th Symphony, which Hulsing used as inspiration to create 79 oil paintings which formed the basis of the whole project.
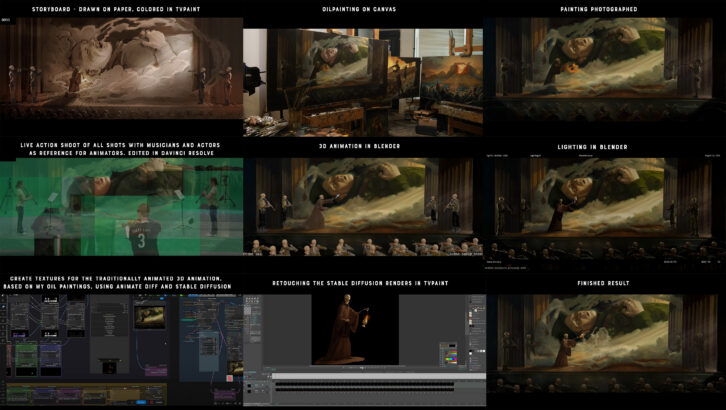
With the series of oil paintings complete, Hulsing could have just sent digital copies along with the storyboard to the animators and left them to develop the animation. Instead, he decided to film all of the shots with real actors first.
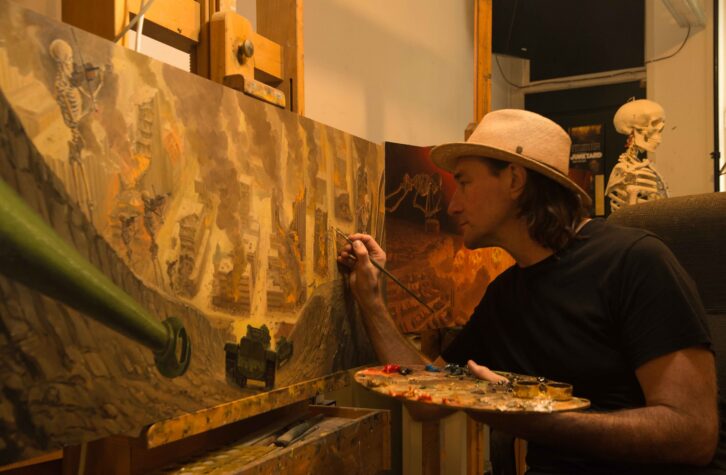
“Filming it with actors was a way to be able to direct the animators,” the director explains, “[and] give them as much guidance as possible. The animators still had a lot of freedom within the parameters that were indicated by the moving storyboard and the live action, but at least they didn’t have to guess what my intentions were.”
Creating a live edit gave the animators accurate real-life footage to work from. This ensured that the final animation was human-like and authentic. Hulsing explains, “Without reference footage, there is no way that an animator can know what finger movements a violin player or a flute player makes, especially when it needs to be in sync with the music. But it is not just about their fingers. It is also about the way musicians move. It is really very specific.”
With all the live action footage recorded, Hulsing utilised DaVinci Resolve to create a live action edit, which became the core of the production. Hulsing says that “cutting the film with actors first gives the edit a fluidity that is hard to reach with animation alone. Even four frames can make a huge difference in emotion, pacing, and clarity. The live-action cut is such a great moment to determine if the story works, if the feelings are there.”
Coordinating animators across four countries
The project utilised 30 animators and artists working across four European countries: the Netherlands, France, Belgium, and Hungary. To coordinate everyone and keep the project moving in the same direction, Hulsing held “weekly Zoom calls to brief the animators, lighters, riggers, modellers, layout artists, VFX artists, and compositors”.
He also used an online platform called Kitsu. “Every stage of the animation of a shot was published there, and I gave notes or approved shots so that it could be taken on by the next department. That way I remained in control.”
During this process, compositor Stijn Calis inserted work-in-progress shots directly into a DaVinci Resolve edit, enabling Hulsing to keep the overall project moving in the right direction.
It wasn’t all plain sailing, though. The challenge of such widespread working was that a lot of the animators were working from home, which Hulsing said “made the process a bit hard to control at times”. Despite preferring to “work with a group of people in one location so that the communication is clear and short”, he decided that having access to the very best animation talent from across Europe far outweighed the downsides.
Using AI to render oil-painting style textures
Hulsing was keen to create a rendered aesthetic that mirrored his oil paintings. The traditional way of doing this would have been to render textures in Blender and Houdini, but he didn’t like the look this produced, explaining it felt “too sterile.”
To overcome this problem, the team “made a very early test that indicated that we could render textures for the 3D animation in a painterly style with a model that was based on my paintings, using the depth map, canny map, and beauty from the 3D animation that was animated and lighted in Blender and Houdini”.
Unfortunately, as soon as the team transferred the workflow from one skeleton to multiple, they quickly discovered issues. “We chose a mass scene with hundreds of marching skeletons, and that became a true nightmare,” says Hulsing.
The solution was to break the animation down into small parts that could then each be pulled through ComfyUI, Stable Diffusion, and AnimateDiff. “We stitched it back together in TVPaint, a regular 2D animation programme, and retouched it frame by frame. After a lot of hard work, we managed to get it done after a month of experimenting.”
Bringing everything together in compositing
The compositing of all the animation layers was carried out by Calis. “Using Fusion Studio, he set up the whole project by compositing all the 3D renders with my paintings to create a precomped version of each shot. He would then replace layers once he received the finished ‘flat’ animation from me. And because he still had all the metadata from the 3D animation, he could use that to manipulate the images that he got from me and merge them as best as possible with my oil paintings, lighting or darkening parts even more than was already done in Blender.”
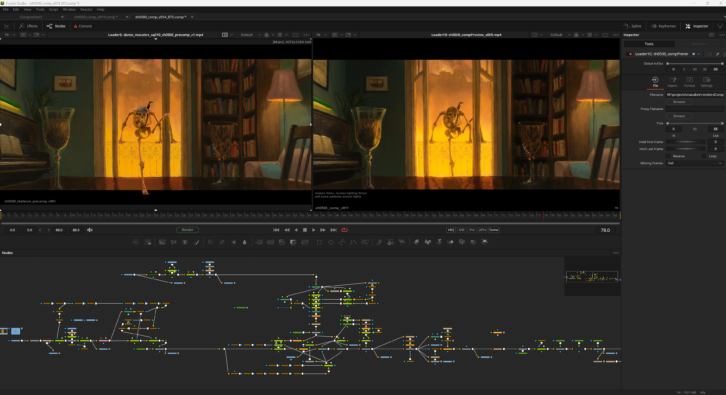
From there, Hulsing produced the final edit in DaVinci Resolve, syncing the video with the audio and adjusting frame lengths, where necessary. Because the storyboard edit was already cut so precisely, the editing at this end stage followed that cut quite exactly.
The final step was colour grading, carried out by Serhan Meewisse, who again used DaVinci Resolve. He created even more dynamic lighting and adjusted colours where required. Hulsing admits that “it was subtle, but it was a great last polish.”
The realisation of a decade-long vision
It is always expected that the final output of any animation looks somewhat different from the original vision and storyboard. This isn’t the case for Danse Macabre. In fact, the final version is very close to the moving storyboard from 2016, then called Resurrection, which you can watch here.
Hulsing didn’t change a single shot, and even the length of the shots is exactly the same. The vision did not change over time, but his biggest worry was to maintain a cohesive style across the whole film. His paintings formed the basis for each shot, but he had not designed the colour palette structure of the film in detail.
Thankfully, Calis and Meewisse were able to deliver the required colour consistency in compositing in DaVinci Resolve and Fusion Studio. Hulsing sums the project up well:
“Even though the film is just five minutes long, the project was extremely complex and ambitious on all fronts, and it seemed almost impossible to execute. Thanks to great teams of very motivated producers and amazing artists in four countries, and with state-of-the-art software, we were able to pull it off. We are very proud of the film, and we hope that audiences will be as touched by it as we are.”